


Green Stuff like a God
By Marshal Barbarossa
Note that this isn't the definitive way on how to sculpt these robes; this is just how I do it...
In order to better understand the tutorial, here's a legend:
#. caption for picture of the same # picture above
* tips
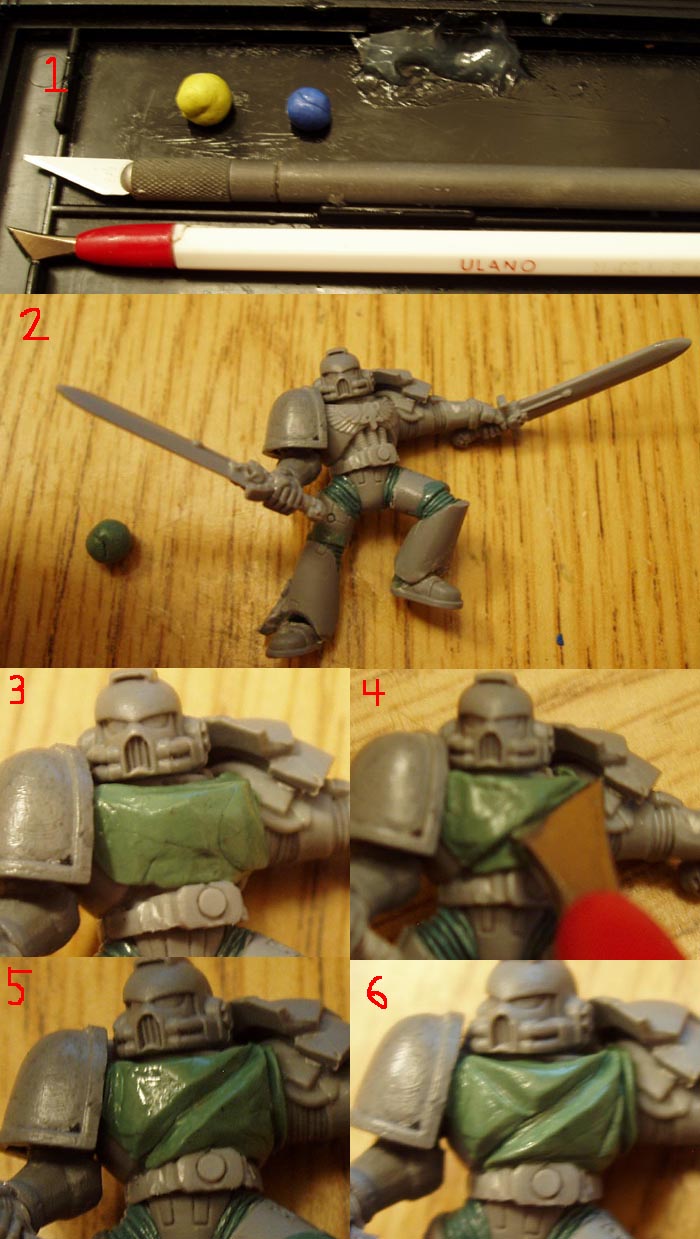
1. The tools I used:
a. sculpting tool of some sort (actually, I don't know what that is, I just use it to
sculpt) - main tool with which I sculpt... It's the red and white one
b. x-acto knife or hobby knife - to cut straight edges
c. petroleum jelly - lubricant... Its the shiny stuff
d. GS of course - no explanation needed
* remember to keep your fingers and tools wet with petroleum jelly throughout the whole process...
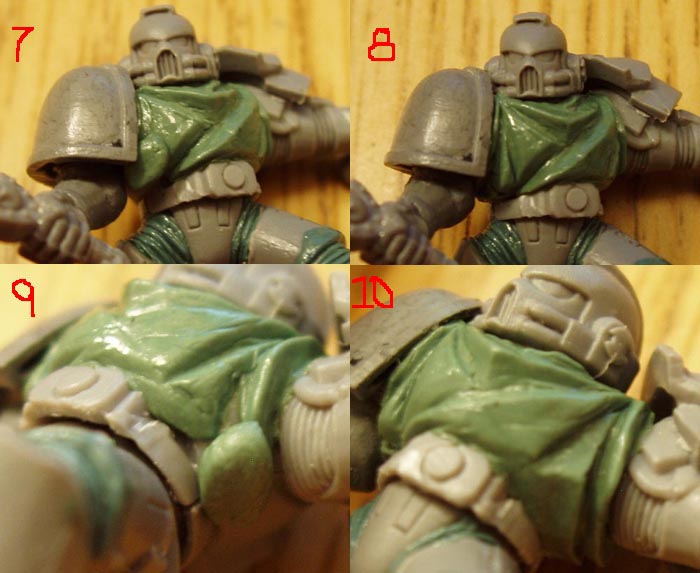
2. The complete model to be robed and a small amount of GS enough for the front chest... Notice that I took out the skull on the chest as it will get in the way later on if I didn't.. Also, make sure that the model you have is at this stage in the building process; most importantly the legs... If the legs have been repositioned, do the GS ribbing before doing the robes...
The arms (with shoulder pads already) may or may not be glued if using single handed weapons or if the arms won't press against the chest.. If you do glue them, use super glue so it would be easy to remove later on... Well talk about why in a little while...
If the arms will press against the chest, then you must not clue them yet... Better yet, don't add robes to models with arms pressed against the chest..
* When applying robes to a model, do not attach the base so that you would have easier access to the loincloth later on...
First, the torso area....
3. Apply the GS evenly on chest... Get an even coverage... It doesn't have to be very smoth yet as it won't matter...
4-6. You can now add the folds as you see fit... I drag the sculpting tool to make the long folds, while the smaller ones I just press the tool into the GS... I drag the tool multiple times to make the "walls" of the fold smooth... I also like to keep the folds a bit sharp and angular to be more akin with GW sculpts...
* Use GW as rough reference on where to place the folds...
7&9. Add GS balls to places without GS yet....
* Don't apply too much GS at one time... Be patient and take your time...
8&10. Flatten and spread the GS with your sculpting tool and blend it with the GS on the model already... Add more folds... If you dont have the arms on, keep the GS out of the area where the arms go on.. It's the round raised part on the side if you didn't know... If you have the arms glued, then make sure the GS gets as close to the armpits as possible...
* Drag the tool to blend it with surrounding GS
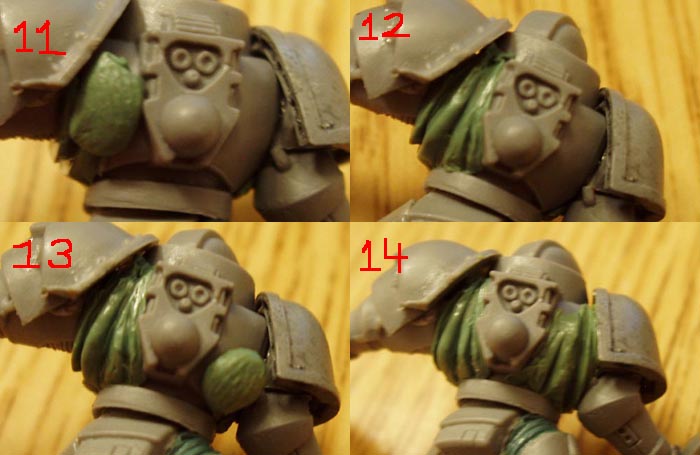
11&13. Pretty much the same as 7&9..
12&14. Same as 8&10...
If the arms and shoulder pads (those with single handed weapons) haven't been clued yet, dry fit them wth a little petroleum jelly by pressing them in the pose they will be glued in while the GS isn't cured yet to make sure they fit later... With bolter wielders, as much as possible don't let them touch the chest... Remove the arms and let the GS cure...
That concludes the torso area... Next up, the hood...
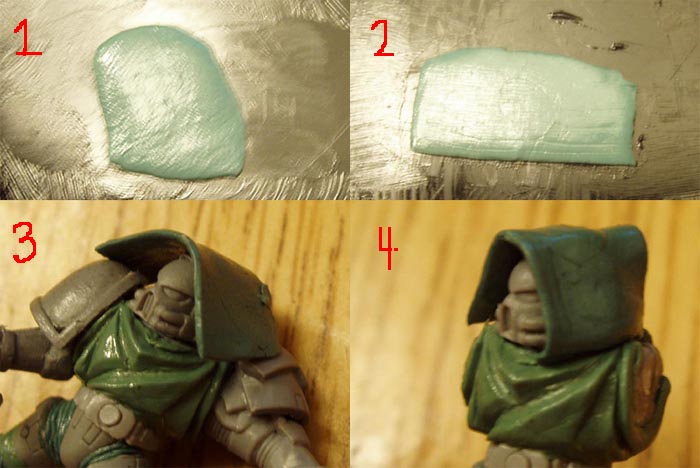
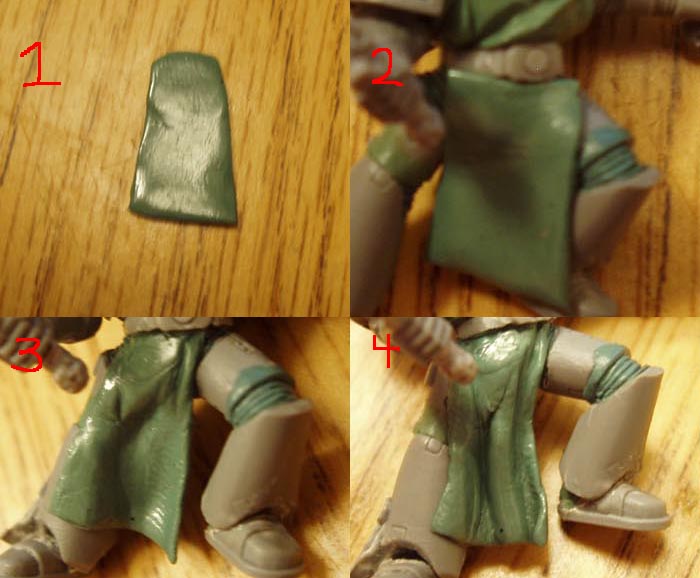
1. A bit of flattened GS...
* When flattening GS, do so on an area which is lubricated well so that it won't stick and thus you will be able to apply to the model...
Let the GS cure a bit before moving on..
2. Make it more rectangular.. The long side shouldn't be too long; approximately 3 times the height of the head you are covering... the shorter sides shoud be about 1.5 times the length of the head.. Cut one long side and both short sides so that you have a straight edge..
3. Drape the GS over the head..
4. Rip-off the arms if glued.. Tuck in one side of the hood as shown with your sculpting tool...
* This is why the arms shouldn't be attached as they get in the way of the tucking process... Well actually just the shoulder pads, but you need those on the arms when the arms are glued so that the GS doesn't get in the wayand everything fits nicely...
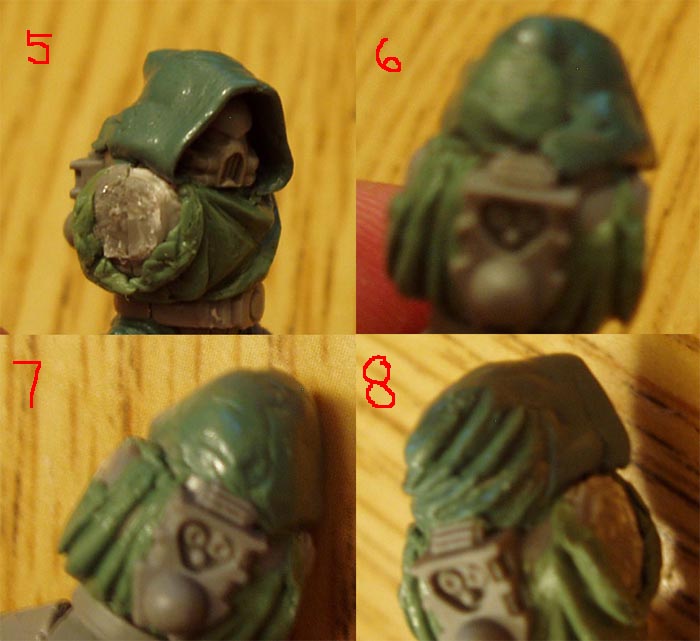
5. Tuck in the other side.. Start shaping the hood... you can have th top rounded, angled or pointed... I make mine angled kinda like the SOBs...
6-7. Fold the rear edge in on itself and then smoothen... You will notice that the collar will get in the way... I like to just get the GS over it... You may also want to cut it off altogether..
8. Add folds like before.. Now you can glue the arms back on so that you can adjust the hood for the shoulder pads.. Once satisfied, let cure...
That's the hood... Lastly, the loincloth...
1. Well start off like the hood... You can also make it slightly tapered at the top...
2. Apply between the legs with the tapered edge touching the belt as shown...
3-4. Shape the loincloth slightly..
* I like to keep one side touching a leg so that shaping wont be too hard...
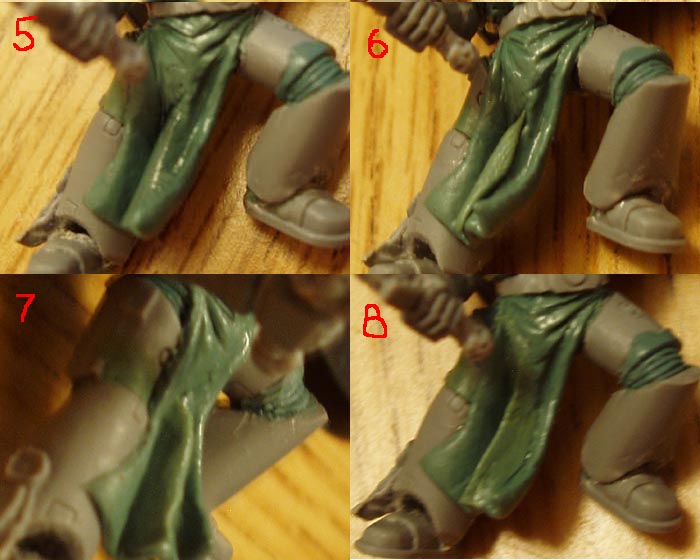
5. Continue shaping and add folds until satisfied and then let cure...
6. Add a sausage of GS over a fold...
7. Blend one side of the sausage to the loincloth making it flat....
8. Blend the other side as in #7 making the very top of the fold edged...
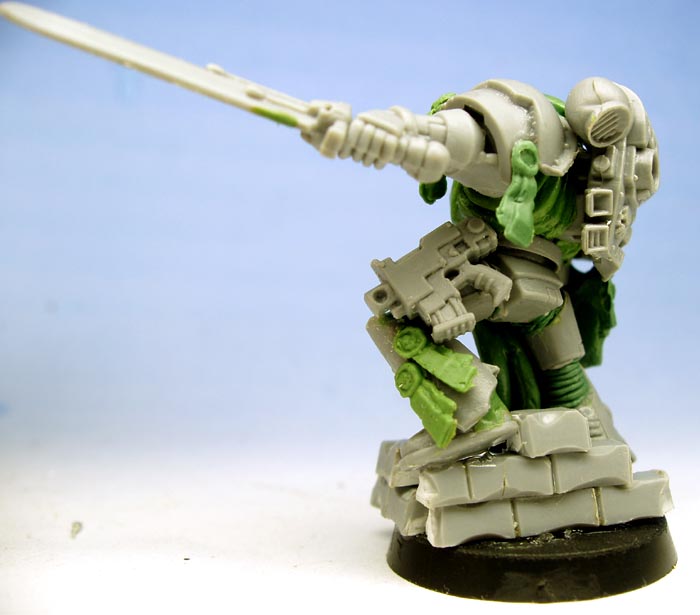
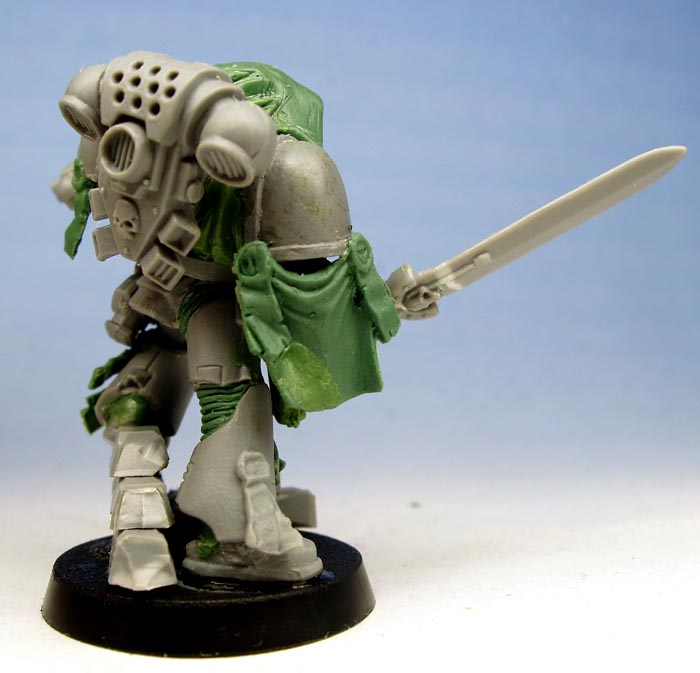
The finished product without extra details
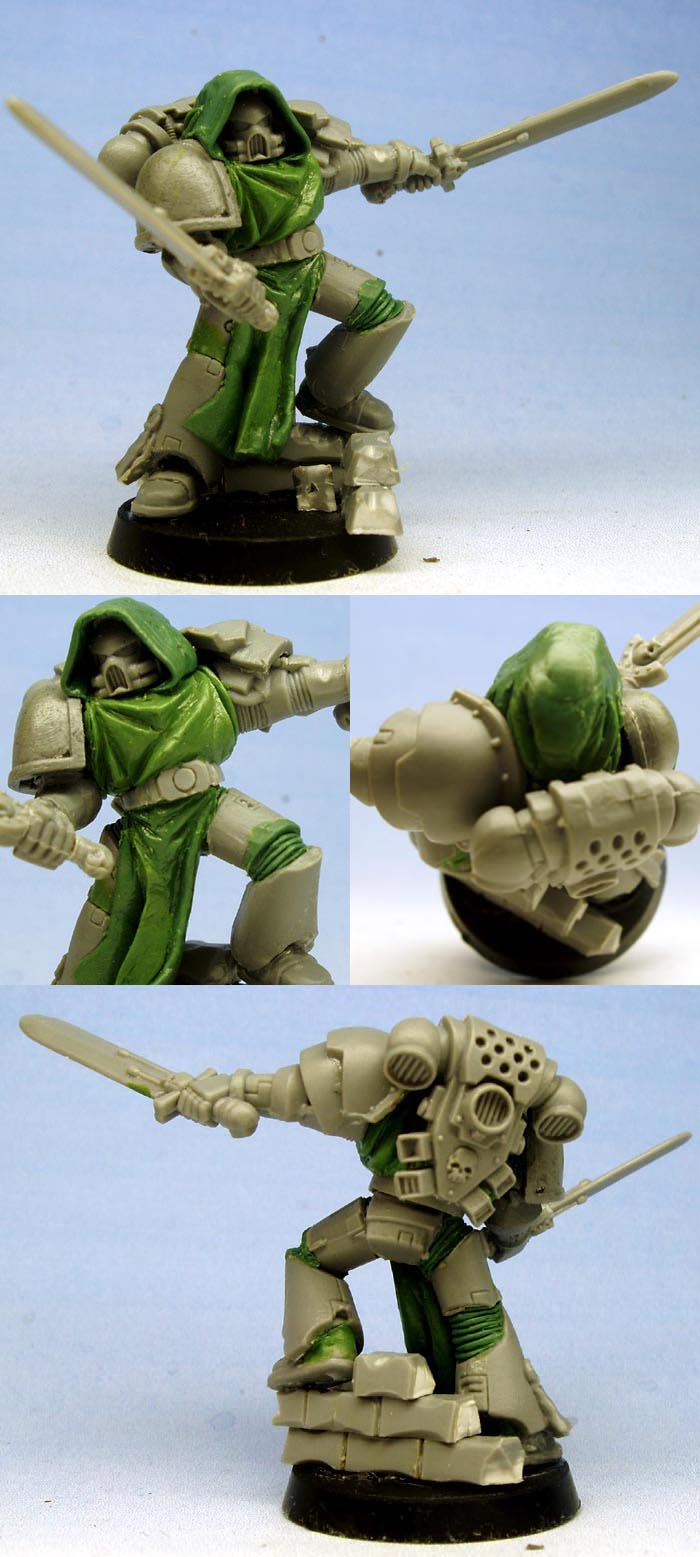
The finished conversion
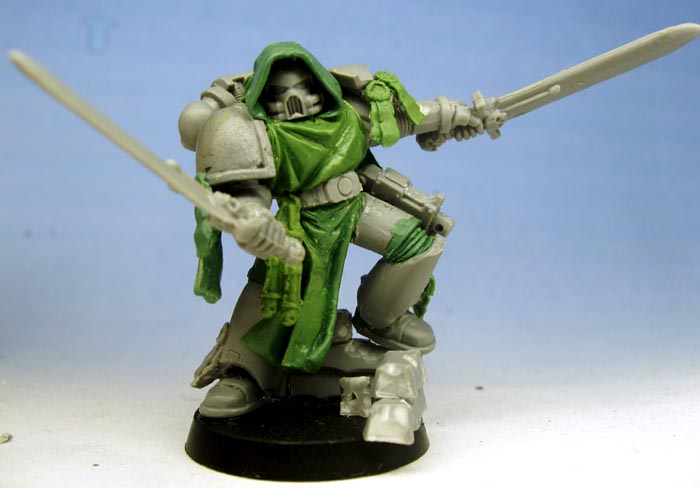
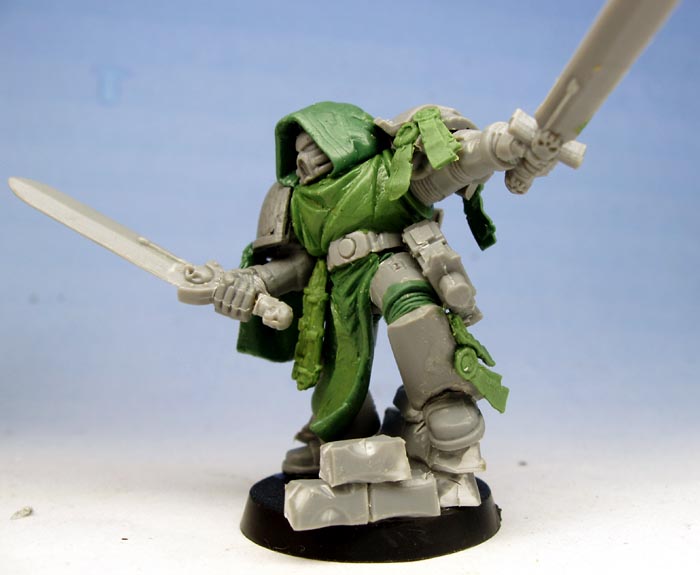
Well there you have it... Marshal Barbarossa's way of making robes... Hope this helps all of you aspiring sculptors...
Enjoy!